10 Oct Preparing The Foundation For Your Luxury And Custom Home
Welcome to this edition of the Louisville Custom Home Builder podcast series brought to you by Louisville’s leading luxury construction team, Artisan Signature Homes. I’m Greg your host and for today’s episode, we are joined by Louisville’s best known and most accomplished custom and luxury home builder, Jason Black. Good to see you, as always.
Jason: Good to see you, Greg. That’s quite a title there. I hope that I can live up to that title you’ve got for me.
Greg: I think you’ve been living up to it for years now. I’m not worried about it.
Jason: All right, good, good.
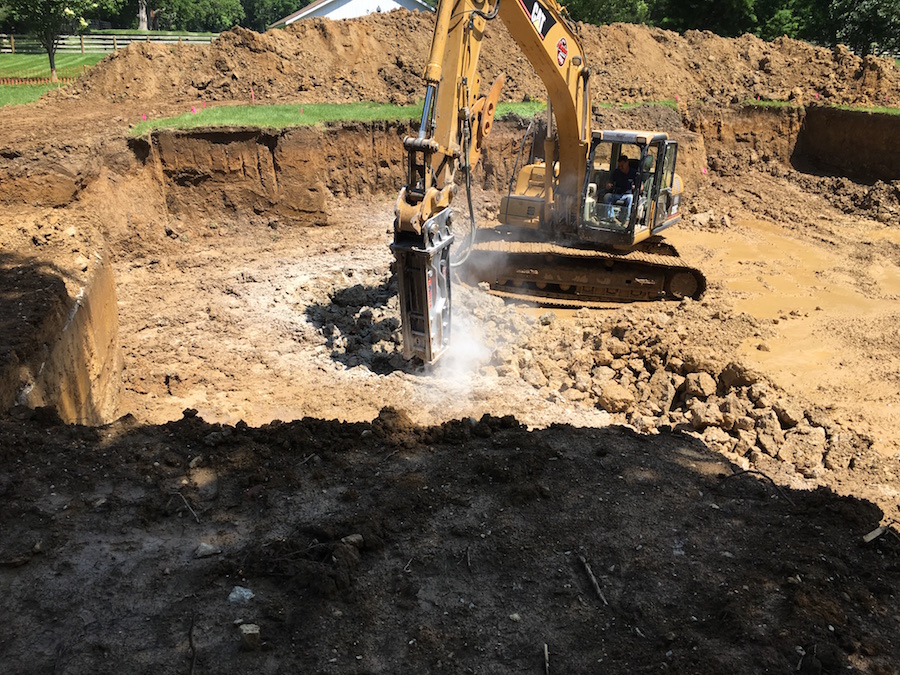
Greg: A couple weeks ago, we were talking about lot preparation and choosing the right lot, getting the designs drawn. You were explaining how the excavators get in there and start the process. We stopped short of actually installing the basement floor, I guess, and the flooring system and the walls and the foundation and the house. Hopefully we can pick up there.
Jason: We ended with the excavator. First we had staked the lot. The excavator came in, dug the basement, removed all the dirt and we had a flat basement excavated under the ground. The next step really is our foundation contractor comes in. River City Foundations is who we use typically on our basements. We’ve been dealing with them for a while. They do great work.
They’ll come in and if we’re two feet below grade or deeper, they will set the actual forms for the footing on the excavated earth. Sometimes if you’re doing a porch or a garage, usually you won’t dig down because you don’t have a basement under your porch or garage, we will dig down about two feet or more. What we’re doing there is we’re trying to dig below the frost line. What happens if you don’t get below the frost line in this climate, you get freeze and thaw. Believe it or not, if you don’t go deep enough, you get moisture under that footer and it freezes. It can actually raise the footer up out of the ground and cause some major issues.
Greg: If you’re doing a house that has a basement and a porch and a garage, will your excavator have leveled off different areas at different depths?
Jason: Yes, yes. Typically, most of the leveling is going to be done in the basement. Then once our foundation contractor comes in, he’ll come in with a backhoe or a track hoe with a bucket that’s about two feet wide and he’ll scoop out that footer. He’ll go down two, three feet all the way around and he’ll dig out the outline of the porch and garage, back porch, any other items that would be an offshoot of the building that’s not a basement underneath of it.
Greg: The footer’s the part that has to be below that frost line?
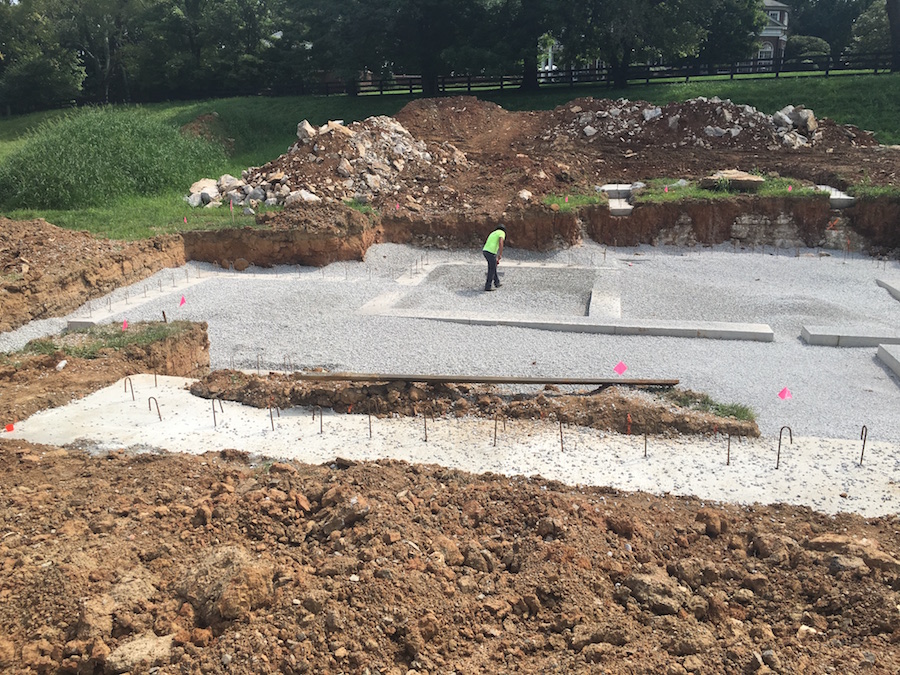
Jason: Absolutely. You want your footer below the frost line. Once we’ve excavated all that, once they’ve formed up all the footings, we’ll come in and we’ll actually put rebar or steel, we’ll line the footer. We’ll run a couple runs of steel all the way throughout the basement, throughout the footing, throughout the porches. We’ll hold those above the grade a little bit. We’ll also put drain tile underneath that footer, a little black corrugated drain tile. We will pour the footing with a high-strength concrete, usually 3500 psi or stronger. We’ll fill all those footings with concrete.
 Greg: What actually is a drain tile?
Jason: The purpose of the drain tile is nobody wants a wet basement. That, I guess, goes into the next step. Let me explain the drain tile while I talk about the next steps. Once the footing has been poured, you’ve got your concrete in there, that’s basically, it’s going to support the foundation.
You take off the forms from the footing. At that point, we’re going to run drain tile. We run drain tile on the inside of the basement footing, so all underneath the basement floor where that’s going to be poured, then we also run on the outside of the basement wall, on the outside of the footing, we also run drain tile all the way around the basement.
Once we lay that drain tile, we will then put about a foot of crushed stone over top of the drain tile all throughout the basement. Your basement floor usually sits on about a foot of rock. Maybe people don’t realize that. We also do that same foot of rock on the exterior of the footer of the foundation. That’ll eventually all be covered with rock or with dirt so that nobody sees that part of it.
What we’re trying to do is keep water from getting through the wall. The point is, we’re trying to drain it below the footing. As all part of this, we put in a sump crock in the basement. Usually that sump crock sits below that foot of gravel. We’re trying to get water, any water, heavy rains or anything, we’ll get it to drain into the front of the basement wall, underneath the basement footing, into the sump crock and then what it will do, it has an ejector on it, it shoots the water back outside of the basement. Usually we’ll try to extend it away far enough from the foundation wall that it doesn’t come right back in.
Greg: You want the water where you can control it and move it away from the most vulnerable parts of the house.
Jason: Yeah, which trying to get rid of that hydro-static pressure that would build up if we didn’t have somewhere for the water to go. If the water doesn’t have somewhere to go, it’s going to somehow find its way through the wall or around the footing or something.
Greg: It’ll find somewhere.
Jason: It will. It will.
Greg: Really silly question. It’s not my first, it won’t be my last. When you’re talking about drain tile, is it actually a tile or is this those big long black tubes that I’ve seen out on construction sites?
Jason: It is. It is a big long black corrugated tube. Usually it has holes in it. We’re trying to get the water into the tube then drain it all the way around the foundation. When you heard me say that I put drain tile underneath the footing, that’s where water will pass through the concrete, underneath the concrete through that drain tile.
Greg: It’s not really a tile at all.
Jason: I’m not quite sure why…. that might be a history lesson to see why it’s called-
Greg: We talked to Krista Boston a couple weeks ago from the tile shop. I’m thinking really pretty tiles or something. I couldn’t figure out how they worked under the house. Silly Greg. Shame on me. Keep going.
Jason: Piping. We put corrugated piping underneath to divert water.
Greg: Which ninety-eight percent of the population will recognize as …
 Jason: You see those big, it’s always black rolled up in a big tube. We’ve got the footer done. We’ve got the drain tile or the hose, the pipe underneath. We’ve filled it with gravel. From that point, we then come back in and we will re-survey the house to plot the foundation on the footing. That footer is usually about two feet wide, maybe three feet wide in places. Depends on how tall the structure is going to be above it. We’ll actually mark where the foundation wall is going to sit. They come and mark it. Once they mark it, the foundation company will bring back in the foundation wall panels.
Greg: Is this all laser-guided or GPS-guided so that they’ve taken your design, you were talking about specifically or how close … precise, I guess, is the right word?
Jason: It is, it’s GPS-guided. What we’re trying to do is make sure we don’t encroach on any of the setbacks or property lines. When you’re building houses in, say, Norton Commons, sometimes our house can be three foot off of the property line. If you have a chimney or porch, you can actually encroach even closer. The last thing we want to do is build over the property line. That causes all kinds of issues.
Greg: Then you bring the basement wall forms in, correct?
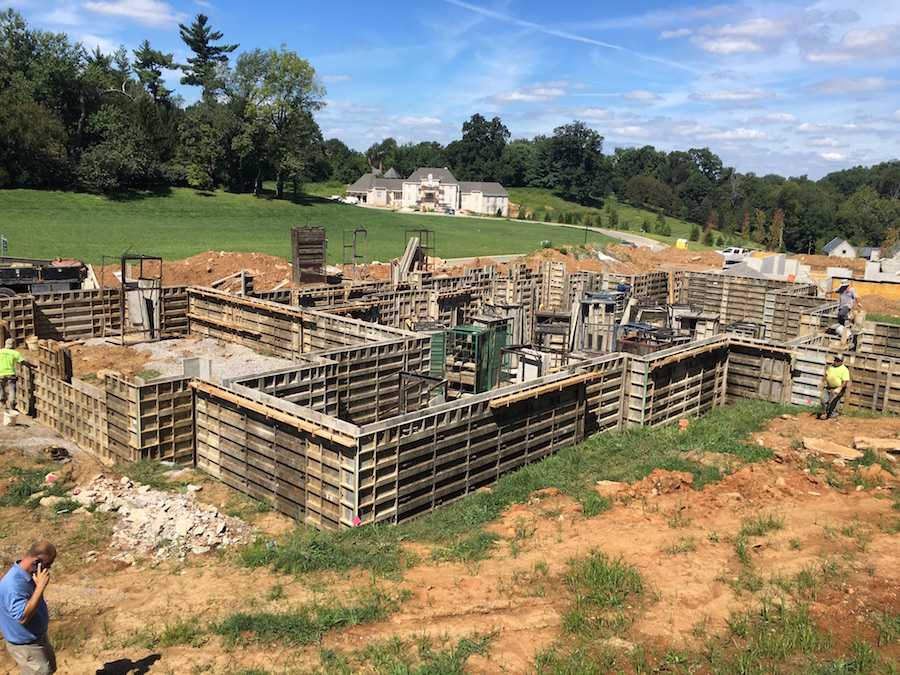
Jason: Yeah. The guy, once he GPSs and marks on the footer, we’ll actually string lines and chalk the outermost part of where those foundation panels are going to sit. They bring in what’s called a big boom truck. It’s got a crane on the back of a semi. They have the forms in a cage. They will hoist these forms over the hole and set them into the basement. That way, once the actual workers that come in get the forms out of the cage, it’s called a double-form foundation. We’re forming the outside of the wall that’s going to be next to the dirt and then we’re also going to form the inside of the wall that will be what will be your finished basement or your unfinished basement down the road.
Greg: You said that there were different grades of cement that you choose from. I guess, a footer might have a different grade cement than a wall? Is that-
Jason: We’re just wanting a structural 3500 psi or stronger. It’s going to cure quickly. You want a stable, strong foundation. Also another thing that helps this concrete strengthen is, as we talked about the footer running steel all the way around, as part of that footing, we also put a vertical member, a vertical piece of steel stuck down in the footer that sticks up.
Once we set our forms on top of it, we’re going to stick more vertical steel in there. We actually tie it to the footer steel, so the concrete, once it’s poured, it strengthens and becomes a part of the footing. You’re tying that steel all the way up and then we run a couple runs of steel a couple feet up all the way throughout the whole basement. You get the strength of the concrete, you get the strength of the steel, then we’re also tying it into the strength of the rebar stuck into the concrete footer. Again, wanting a very strong, stable foundation. Does it make sense?
We’ll get some illustrations maybe to throw out on the podcast so people can see exactly what we’re talking about.
Greg: There’s a lot more that goes into it than I was aware. I’ve always heard about these things, but of course you don’t see it in a house. It’s not part of finished … Obviously, it’s finished but you don’t get to see it.
Jason: Most of this gets covered up with dirt and two by fours by the time most people make it to a job site.
Greg: It’s probably pretty important to do right.
Jason: Absolutely. One of the things, once that foundation wall is poured, we will let it sit for a day and then we will, it’s called wrecking the foundation, which you don’t really want to wreck the foundation. Don’t make any smart comments, Greg, but we’re going to take the panels off that we’ve poured the concrete in. We’re going to remove those and then we’re going to waterproof the foundation.
We will spray, basically, it looks like black tar, but it’s a waterproofing foundation membrane that seals the foundation. It’s really protecting the foundation. If you ever get any hairline cracks or anything like that, it’s really meant to move with the foundation to keep water out.
 Greg: I imagine the rebar in the wall also helps with any cracks that might eventually pop up, not really spreading and grow into something that would be problematic.
Jason: The one thing is that you can guarantee with concrete is, it is going to crack. You’ll get a lot of hairline cracks. If you get anything major, then you probably have an issue. You will have some small hairline cracks. A lot of times you’ll get them if you have a window in the basement or if you have what’s called a step-down. Maybe you have a ten foot wall poured in one area and it walks out into the basement to a six, five, four foot tall wall. Sometimes you’ll see some hairline cracks between those steps in the foundation.
Greg: Why would a window cutout or a step-down cause something?
Jason: You’re going to have a span of concrete that’s maybe four or five, six foot wide with an open hole in between it. You get all that pressure on those points. That’s why we’ve got the steel in there. It really tightens it up.
Greg: Again, at the end of every podcast, I remind myself why it’s good that you’re doing this and I’m not. Thank you for the education once again.
Jason: That’s right. I think that about covers it. We waterproof the foundation. We also waterproof the footings, so we’re getting a tight seal between the wall and the footing. That’s all coated in black tar. Once that’s had a chance to dry, at that point you can then start backfilling the foundation. We like to wait a week or two before we backfill, just to let that concrete … It takes a couple weeks for it to completely cure. We don’t like to backfill a freshly poured wall real fast. Backfilling is just getting rid of all the voids where they guys have been in there working. It creates that nice clean look when it’s all completed.
Greg: Do you find that your clients get a little antsy? They’ve seen the foundation poured. Does it look like nothing’s being done while you wait for the backfilling?
Jason: What I like to do is once the foundation is poured, that brings in the next step, which maybe we can hit that at another time. You get into your rough plumbing, which goes into your basement floor underneath the slab. That will be the next episode that we’ll get into.
What I like to do is, once the rough plumbing’s done, once we’ve poured a basement floor and once I’ve put the sub-floor on, I’ve really strengthened that foundation. It’s got support pushing down, it’s got support in the basement. At that point, I will then backfill the foundation.
Greg: Got you. Wonderful. I appreciate it once again. I look forward to the next house building 101 class that you’re teaching me. Thank you so much.
Jason: All right, Greg. Look forward to sharing it with you again as well.
Thank you for joining us on this episode of the Louisville Custom Home Builder Podcast. If you’re looking to build a home and would like to reach out to Jason with any questions about the process or maybe just your individual needs and desires, please visit the website at artisansignaturehomes.com. That’s www.ArtisanSignatureHomes.com. We appreciate your time with us today and look forward to bringing you another episode next week.